One of the most common misconceptions about camera-based seal inspection is what it actually measures. When QA managers ask "can your system check seal integrity?", they sometimes mean seal burst strength — the force required to peel or rupture the seal. The honest answer is no: a camera doesn't measure that, and neither does any other non-destructive inline method currently in common use on food production lines.
What camera inspection does measure is the set of visual indicators that correlate with seal failure risk: contamination in the seal zone, geometric anomalies in the seal bead, wrinkle patterns that indicate incomplete film-to-film contact, and seal width deviation from specification. These visual indicators are not a perfect proxy for burst strength, but they're the practical early-warning signals available on a production line without destroying the product.
Understanding the distinction — what vision detects versus what it infers — is necessary for setting up a seal inspection program that's useful without being misleading.
How Heat Seals Fail and What Vision Can See
Heat seals on flexible packaging fail through several mechanisms, most of which leave visible evidence at the seal zone.
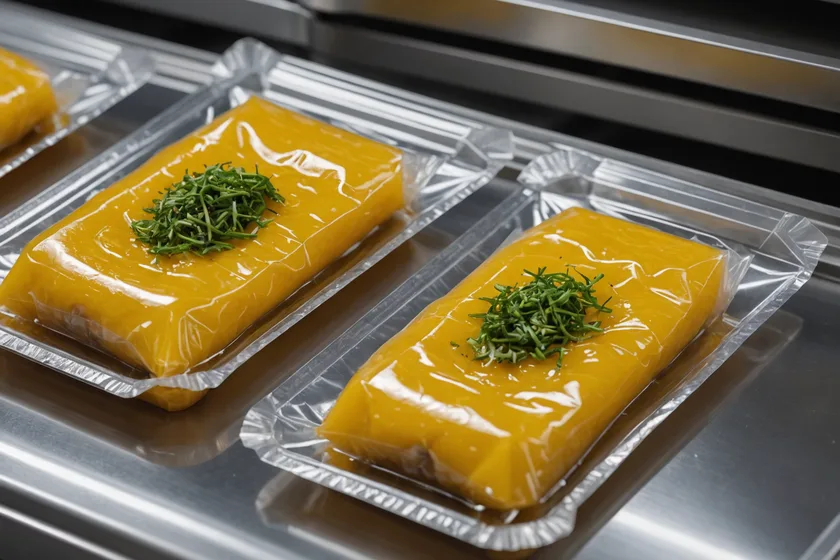
Contamination-induced seal failure. This is the most common and visually detectable failure mode. Food product — sauce, particulate, oil — trapped in the seal zone prevents film-to-film fusion during the heat-seal step. Under transmitted or diffuse reflected light, a contaminated seal zone shows as an opacity variation: a clear or uniformly translucent seal will have a visible inclusion where the contamination is present. On most flexible packaging films (polyethylene, polypropylene, multilayer laminates), this optical contrast is detectable by camera at production line speeds when the lighting setup is appropriate for the film type.
The important caveat here is film transparency: on opaque packaging where you can't see through the seal zone at all, camera-based contamination detection is not applicable. For transparent or semi-transparent packaging — common in produce, deli, dairy — it works well. This is a lighting and film-property question, not a fundamental technology limitation.
Partial weld / incomplete fusion. A heat sealer that's running cold, or that has uneven jaw pressure due to a warped jaw or worn gasket, produces a seal that's bonded in some areas but not others. The visual signature of a partial weld is a characteristic pattern: the sealed areas show as a distinct appearance change at the film interface (the film fuses and the surface texture changes), while unsealed areas retain their pre-seal appearance. Camera inspection trained on this specific pattern can detect partial weld zones, particularly at seal edges where the jaw geometry creates characteristic failure patterns.
Seal geometry deviations. A correctly functioning heat sealer produces a seal of defined width (typically 8–15mm for most flexible food packaging) at a defined position relative to the package edge. Seal width variation — caused by jaw misalignment, film tension variation, or timing issues — is measurable by camera. Seals that are narrower than specification have reduced peel strength even without contamination. Seals that extend too far into the product zone can create quality issues unrelated to seal strength. Both are geometric measurements that edge detection handles cleanly.
Wrinkle patterns. Film wrinkles at the seal zone, caused by film tension inconsistency or packaging geometry, create areas where film contact during sealing is inconsistent. Wrinkled seals often have reduced peel strength even when they appear visually sealed. The wrinkle pattern is directly visible as a surface texture deviation from the flat, smooth appearance of a correctly formed seal.
What Vision Inspection Cannot Tell You About Seals
Being clear about limits is important here. Camera inspection cannot tell you the seal peel force in Newtons. It cannot measure whether a seal meets a minimum burst pressure specification. It cannot detect molecular-level adhesion failures that leave no visual evidence. And it cannot reliably detect contamination in opaque seal zones where there's no transmitted light path through the seal area.
Destructive seal testing — pull-tab peel tests, burst tests, vacuum decay tests — remains necessary for establishing seal process parameters and for periodic validation of seal quality. What camera inspection adds is 100% screening for the visual indicators that predict seal failure risk, which substantially reduces the number of sealed packages with contamination or geometry defects that make it through to destructive testing or, worse, to the consumer.
The right way to frame camera-based seal inspection in a HACCP-compliant quality program is as a continuous screening layer that catches the subset of seal defects with visible surface expression, complementing the periodic destructive testing that validates the process parameters. It's not a replacement for destructive testing at critical control points — it's a way to catch the obvious seal failures before they accumulate in finished goods inventory.
Lighting Configuration for Seal Inspection
Seal zone inspection is lighting-sensitive in a way that matters operationally. The three lighting configurations that work best for different seal types:
Transmitted (backlit) illumination is effective for transparent and semi-transparent films where you want to see through the seal zone to detect contamination inclusions. The camera is positioned on the opposite side of the package from the light source; contamination shows as opacity variation against the backlit field. This works for pouches, lidded trays with film seals, and vacuum-sealed transparent packaging.
Diffuse dome illumination is effective for detecting seal geometry, wrinkle patterns, and partial welds on opaque and reflective packaging. Diffuse lighting eliminates the specular highlights that make surface irregularities hard to distinguish from background. The tradeoff is that it's less effective for contamination detection on transparent films (transmitted is better for that).
Coaxial (on-axis) illumination is used for high-contrast detection of seal bead geometry on foil-laminate and metallic packaging, where the reflective surface requires on-axis illumination to produce useful contrast at the seal edge.
In practice, many seal inspection applications benefit from dual-mode illumination: a transmitted channel for contamination detection and a reflected channel for geometry measurement. This adds cost to the lighting setup but substantially improves detection coverage for the full range of seal defect types.
A Scenario: Sauce Pouch Line, Contamination Detection
A pouch-filling line for a Midwest co-packer running hot-fill sauces at 280 units per minute was experiencing a recurring seal failure pattern: pouches with sauce contamination in the top seal zone, causing weak seals that failed during distribution handling. The line used a form-fill-seal machine with a horizontal jaw sealer, and the contamination was entering the seal zone as overfill splash during the fill step.
The contamination rate was approximately 0.6% of pouches — low enough to escape the end-of-shift visual inspection sampling but high enough to generate consumer complaints and distributor claims for product damaged in transit. The contaminated seals didn't fail immediately; they typically failed 3–7 days after fill under mechanical stress from palletization and handling.
After deploying inline transmitted-light camera inspection on the seal zone, contamination detection ran at 91% sensitivity — catching 91% of pouches with visible seal zone contamination — with a false reject rate of 0.4%. The remaining 9% of contaminated pouches that passed inspection had contamination smaller than the minimum detectable feature size at the camera resolution deployed. Increasing camera resolution to 5 megapixels (from 2MP) on a follow-up calibration improved sensitivity to 96% without changing false reject rate.
The contamination pattern in the inspection log data also showed a time-of-shift dependency: contamination events were clustered in the 20 minutes after each fill nozzle cleaning cycle, indicating that residual cleaning fluid was temporarily reducing fill-nozzle surface tension and increasing overfill splash. That root cause finding came from the per-unit timestamp data, not from the defect catch rate alone.
Setting Up Thresholds for Seal Inspection
Seal inspection threshold calibration starts with your product-specific requirements. For a food safety CCP (Critical Control Point) on contamination, you typically want high sensitivity with an acceptable false reject rate — the economics favor erring toward rejection of questionable units. For a seal geometry check that's an aesthetic quality parameter rather than a food safety concern, a wider tolerance band and lower false reject target may be more appropriate.
The practical starting point is a calibration run: fill the line with production product, introduce known defects (deliberately contaminated seals, known-geometry-defect test pouches) and adjust detection thresholds until sensitivity and false reject rate are in the acceptable range for the application. Expect to spend 3–4 hours on initial threshold calibration for a new SKU. Per-SKU calibration profiles are necessary when sealing parameters and packaging materials differ across products.
The goal is a threshold that catches the failures that matter — contamination events large enough to compromise seal strength, geometry deviations outside specification — without generating so many false rejects that line operators start ignoring or overriding the inspection system. An inspection system that rejects too aggressively loses credibility with the line crew and eventually gets disabled. Threshold calibration is as important as the hardware decision.